|
|
Mini mill tool holder Last updated: 05 Dec 2016 |
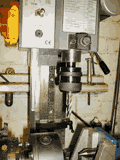
I've had the mini mill for around a year now and all the end mills and other tools have always been held in the jacobs chuck. This is clearly not the way to do it, and has led to some "interesting" moments. I don't want to take any other projects forward, those than involve milling anyway, until this one is completed.
Armed with a sketch of what I think a tool holder should look like, construction has started.
 |
 21-Apr-2003: The materials have been prepared - as the holder has a
thick end and a thin end, it created the problem of having to remove a lot of steel to get the correct shape.
This has been avoided by glueing 1" diameter and 2" diameter steel bars together using epoxy adhesive and an interference fit of 0.05mm (0.002").
The other 2" diameter offcut will end up being the screwed retaining ring. 21-Apr-2003: The materials have been prepared - as the holder has a
thick end and a thin end, it created the problem of having to remove a lot of steel to get the correct shape.
This has been avoided by glueing 1" diameter and 2" diameter steel bars together using epoxy adhesive and an interference fit of 0.05mm (0.002").
The other 2" diameter offcut will end up being the screwed retaining ring.
|
 |
The external turning has been finished, including the MT3 morse taper and the M42x2.0 thread for the retaining ring on the end. I've deviated from the sketch a little bit and left a ring on the thick end to allow for knurling. |
 |
22-Apr-2003: The new fixed steady is earning its stripes allowing the 25mm hole to be bored in the end. This is the final bit, a 15 degree taper at the end of the bore. All this part needs now is the other end drilling and tapping for the M12 drawbar that comes with the mini mill, and some knurling if the diameter will fit within the capacity of the knurling tool I have. The boring tool shown is a simple "D bit", Gingery style. |
 |
27-Apr-2003: Flipped round, the thin end is now being bored to take the M12 tap for the drawbar. Aside from the knurling and checking the accuracy of the Morse taper, the main body of the tool is complete. |
 |
Last part, the retaining ring which will screw onto the M42x2 thread of the toolholder and keep the collet in. This is the retaining ring being bored prior to internal threading. After the picture was taken, the internal threading tool disintegrated due to careless use. More next weekend... |
 |
02-May-2003: New threading tools have arrived so the final details have been finished. The collet shown is 1/2" (there is only one right now), all the parts have been cleaned with Brillo pads ready for oxide coating. |
 |
Oxide blacked and fitted to the mini mill. Seen here holding a 7/16" endmill (1/2" shank). Need some more collets now... I know that MT3 collet systems can be bought from a number of sources, but it was interesting to try and make one and practice some accurate machining. |
These pages are maintained by Duncan
Munro. All content on this site is Copyright ©2002-2026 Duncan
Amplification.
Warning: These pages consist of images and descriptions of equipment
which can reach high temperatures creating hazardous and potentially dangerous
situations. These pages should not be taken as a step by step guide on how
to construct any items or carry out any particular procedure, nor should any
references to safety contained herein be taken to guarantee safety in all
situations.